Quickly create a bricked-up window or doorway
Buildings are often repurposed over the decades since they were built. Walls are extended, new sections are added, and often windows or doors are permanently sealed. I'm going to show you how to quickly create an insert from a 3D printed building that represents a window being sealed with bricks. Change the size of the bricks to represent concrete blocks or even use wood siding. I'm going to illustrate the process using an arch-top window, which is usually pretty challenging to get sized just-right.
The Wall & Window Opening
This is the wall from a background structure. This wall was already modified to make it longer and change one of the lower  windows into a freight door. The opening marked with the "X" will be walled up with brick.
All of the steps needed will be done using your printer's slicer software - no special CAD software or other skill is required.
We're going to start by loading the wall into the slicer. Select the wall object, then click the CUT tool. Change the cut orientation 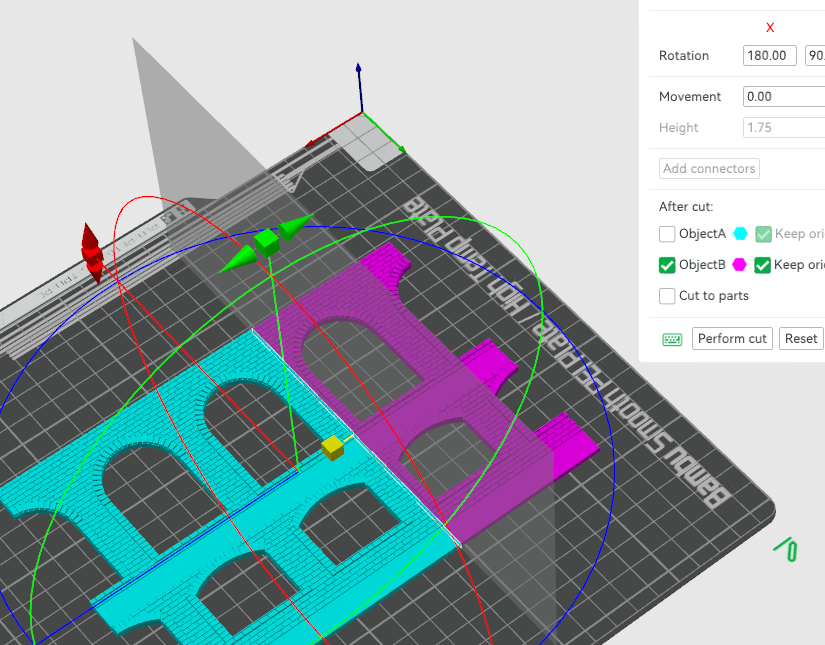 if necessary and position the cut just outside of the window frame. I selected the option to discard the blue part, because we only want the area of one window. Repeat the cut process to trim the other side and the bottom until you have the wall with just one window. The positioning isn't critical, but you want enough space around all sides of the opening. This part is going to become a "mask" for a piece of bricks that is just larger than the opening, which we will create next.
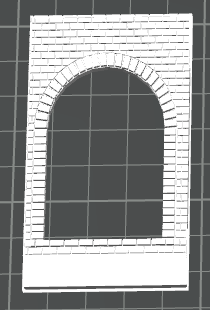
Once you complete this step, the part should look something like this:
Brick Sheet
Next, we need to create a sheet of brick texture just a bit larger than the opening that you want to fill. You might have an STL file with brick texture or you can cut a strip from between the windows, duplicate that strip, and then merge the parts together aligning the brick joints as best as possible.
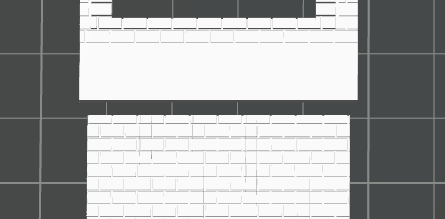
In the image to the left, note how the brick sheet at the bottom is slightly narrower than the window part but wider than the window opening. Select each part, one at a time, and use the option to center it on the build plate. You might need to select the brick sheet and move it up or down slightly to make sure that the bottom row contains a full brick.
The magic of masks
It's time to create the part! Select both the brick sheet and the window, then use the Merge option to combine them into a single part. Select the window frame part and locate the Change Type option and select "Negative Part", then click OK. While this part is still selected, select the 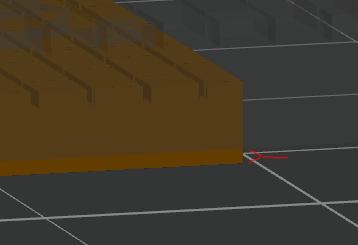 Scale tool and increase the Z height by 2mm. Make sure you have not selected "uniform scale"! You only want to increase the height so that the solid part of this element completely covers the brick sheet. Now use the Move tool and slowly increase the Z axis height until you can see a small lip at the bottom. This lip should be at least 0.5mm and no more than 1mm.
Note the small lip shown by the red mark in this image. When the part prints, the bricks will fit through the opening and this will provide a rim on the back-side of the wall to allow the glue to adhere.
Here is a preview of the finished part. The bricks are exactly the size of the opening and the lip is shown. The lip is fairly thin and can be cut with an Exacto knife, filed, or sanded to provide a better fit.
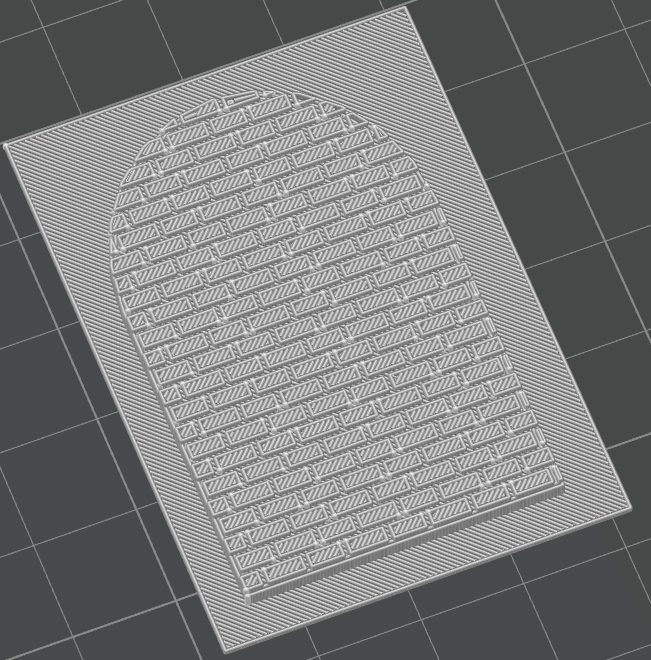
Note that this brick is EXACTLY the size of the opening and will be a tight fit! If you feel that it is too tight, you can either file/sand the opening or you can reduce the part by a small amount before printing.
On the right is the part installed in the printed wall, after painting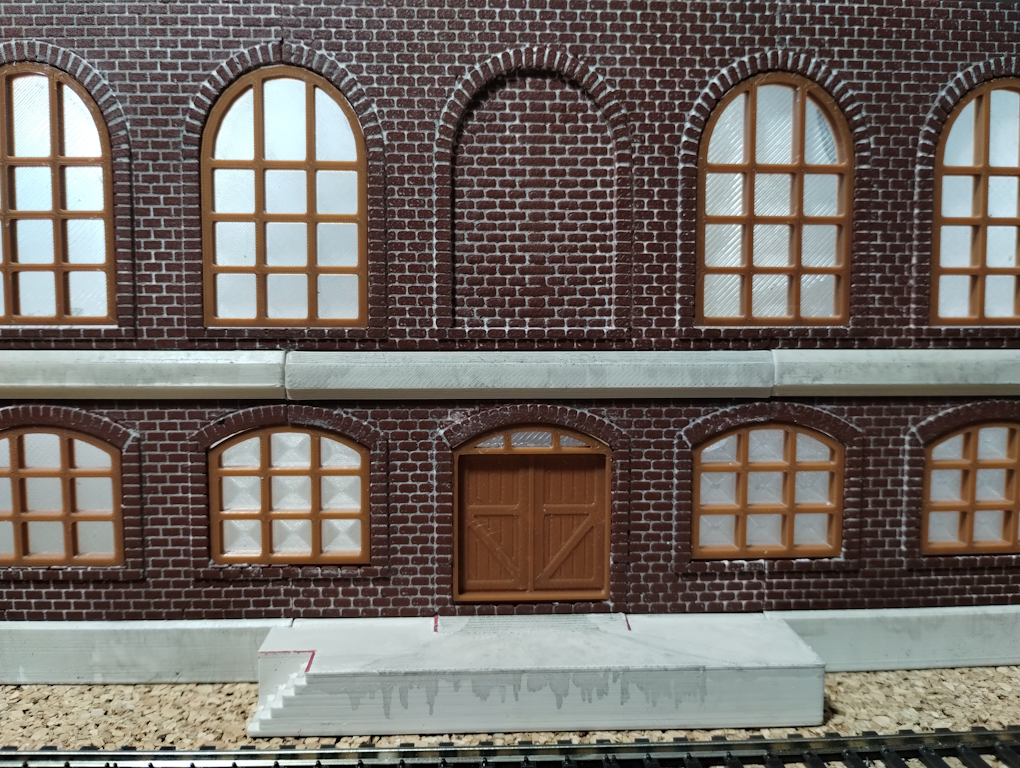 and detailing.
The mortar is done by rubbing lightweight spackle compound into the joints, rubbing off the excess, then letting it dry. Once dry, I clean it up with a damp sponge, then apply a dark gray wash to tone it down a bit.
I also added the loading dock by creating a cube with several negative cubes to create the stairs. The edges are lined with "safety red" paint. The first coat of weathering with a dark wash was applied to the dock and all concrete components.
I've used this technique for other structures where I need a tight fit to close off an opening. I hope this inspires you to experiment with your printer and slicer software!